ZSA Navigator Review - Trackpad
Reviewing the recently released Navigator trackpad by ZSA.
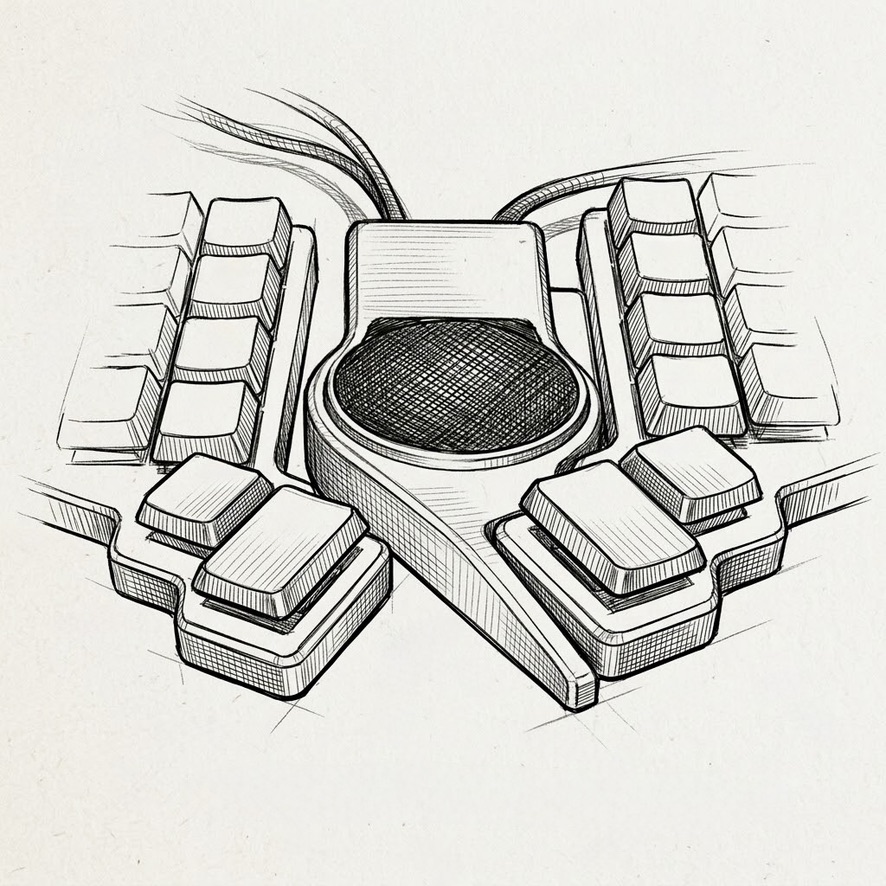
ZSA Navigator - Trackpad Review
Background
Today I will be writing my thoughts on using the ZSA Navigator - Trackpad edition. As someone who has been a ZSA consumer for the last couple years and a Voyager user for less than a year, I was excited when ZSA announced and released the Navigator series. It first started with the Trackball which I have used and was very happy with but my main criticism of it was that the enclosure the ball was in made it very difficult to use for someone who enjoys aggressively tenting their Voyager as it would routinely wobble up against the wall of the enclosure or be at risk of falling out completely which made the entire product a bit unusable unless I reduced the tenting which I was not prepared to do.
So imagine my excitement when ZSA announced an additional entry into the Navigator lineup, their Trackpad. I should caveat this by stating that the Trackpad was actually conceptualised by Robin Leinonen (Rookwork) when he ideated and built the Saucer for the ZSA Voyager, initially connecting it on the right side of the Voyager to the exposed I2C pins and then going down the route of adding it in-line to the TRRS connection the two halves use, which is ultimately where things ended and the design was used. You can find out more information about Robin’s journey with the Saucer here.
I have been using the Navigator trackpad for the last couple of weeks and I can state that the build quality feels good and very similar to the Voyager itself. It does not feel like a cheap quality add-on. I predominantly use the Trackpad on macOS and have experienced some strange software oddities with the mouse but this is mostly stemming from the issue that Apple does not have open standards for third-party trackpads and this is the primary reason that ZSA released a companion application that needs to be installed to help support native gesture support and other features you would expect on macOS. For what it is worth, the Navigator trackpad does work without issues on Windows (I wouldn’t know) and Linux. This is because the support for pointing devices is an open standard.
Setup
From here-on-in, I will be referring to the Trackpad as the Navigator; I am not discussing the Trackball variant.
The Navigator is very simple to set up as it attaches magnetically to the Voyager and includes a TRRS hub so that you can daisy chain the Navigator on the TRRS connection. The result is a clean implementation of the Navigator.
My only criticism of the Voyager series has been the cable situation. I understand the reasoning behind the cables and ZSA themselves have stated their justification for it, which can be found here and I completely agree with them on their justification. I just don’t like cables cluttering up the workspace. I am a minimalist at heart.
After setting up the Navigator in Oryx (if you need help with that, see this tutorial by ZSA), I experienced a basic trackpad that I needed the companion app for, due to the aforementioned Apple support. I got it up and running with the companion app and was suitably surprised that I now had a pointing device very close to the keyboard. As someone who came from the Trackball to this, I no longer had to worry about the Trackball falling out of the cradle and could just use this as-is, fantastic!
However, once the moment wore off, I found that there were some issues which are still to this day sort of keeping me away from the Trackpad.
Build quality
The Navigator is actually two pieces, provided you buy the entire kit and not just the core. The core is the trackpad itself and it then comes with a ‘shell’ which is what contains the magnet for you to attach it to the side of the Voyager. The shell is made from the same plastic, ABS I presume, that the Voyager’s top shell has and it is fine. I am not going to rave over a piece of plastic but it does what it needs to.
The trackpad itself feels like a premium piece of gear despite it being encased in the same plastic that is slotted into the shell. The cables that come with the Navigator are braided cables and I much prefer the braided cables over the moulded cables that the Voyager comes with. I would have preferred braided cables throughout the entire series. Braided is definitely the way to go.
I would give the build itself top marks here. There is nothing I could take off as it is doing what is intended and mimics the top shell of the Voyager, making it look like it is part of the furniture and not something that was an afterthought.
Design
The design of the trackpad fits well to the rest of the keyboard. For some people with larger fingers, the trackpad may leave you wanting as it is a small surface area and by the time you begin scrolling, the trackpad has ended. This is especially true if you are used to using the Magic Trackpad and its gigantic, in comparison to the Navigator, surface area. It may leave you wanting because of the surface area but we have to bear in mind that this is a companion trackpad and will indeed replace most, if not all, basic pointing requirements but may not replace a dedicated mouse for more complex pointing needs.
As an example, as of v1.0.3 (4), the Navigator now has two-finger gesture support in macOS and I still find it difficult to go back on a webpage because I cannot complete the entire action due to hitting into the keycaps; thus, the action of going back never actually completes. To support this, I have tried around 30 times just now to leave a webpage and go back and it never completes. If I use the Mac’s trackpad, it works on the first try but purely because of the size of my fingers and the surface area needed.
Two-finger scrolling up and down is not a problem and I think the size of the trackpad is good vertically for most, if not all, fingers to comfortably scroll.
Finally, I don’t fully understand the design choice here as I have only just noticed this while looking at the outer shell but the bottom of the shell has a noticeable gradient to it when it ends at the thumb cluster. I wonder if this is to support you taking the shell off the Voyager or for some other reason. I may ask ZSA to clarify this design because the rest of the shell sits uniform with the rest of the Voyager, so my guess is this is to help you remove it?
Positioning
As I previously mentioned, I do quite an aggressive tent on the Voyager where I normally use the keyboard between a 45°-90° angle, usually closer to the 90° angle. The angle of the Voyager is mostly out of comfort and to prevent a host of problems that I do not want to have as a result of bad typing. For more information on my use-case, see the Floating section.
Because of the angle, I now find that the Navigator is a long distance away. When your fingers rest on the homerow and you move to manipulate the trackpad, it feels like it is a long distance away and causes a noticeable shift in my wrist position. I could keep my wrist in place and articulate my hand to bend and stretch but this is not recommended as it is a ‘Radial Deviation’ on the wrist which is not recommended outwith the 15°-30° range of motion. When I keep my wrist resting where it is (I am writing this post in a Starbucks right now with the Navigator and the tables here are circular and too high) and I go to reach for the Navigator, I feel the muscles in my wrist (flexor carpi ulnaris) being stretched and I suspect if I did this motion over a prolonged period of time that I would develop some form of RSI (Repetitive Strain Injury).
I would like to point out that the Voyager, when it is situated flat on the table or with the small tenting feet, the trackpad is a lot more usable than if it was tented. This then raises the question of whether ZSA tested the trackpad internally with an aggressive tent or not. I suspect they did given how meticulous they are, but I just find it curious that nobody is mentioning the potential for discomfort growing quickly.
I have yet to try this but there are 3D printables available to move a Trackball down to the position where your thumb is, meaning that instead of having to do an aggressive motion to your right or left, depending on where the Navigator is, you would just have to move down from the homerow and the Navigator is there. This would make a lot more sense to avoid any form of wrist deviation but would then be dependent on you moving your arm backwards to meet the Navigator. The printable in question can be found here.
Each of us is built differently and this might not be a problem for others but I do feel strain quite quickly and I want to reduce any cause for concern.
Floating typing style
Generally when you use a split keyboard, you will most likely have it flat on your desk or with some kind of tenting puck to give it a bit of lift, maybe 5-15° (I could be wrong on these numbers, it is just a guess). This then sort of forces you to have your fingers resting on the homerow, where all 8 fingers are making contact with the keycaps and this is generally the accepted way you should be using your keyboard.
What is interesting here is that your wrists will most likely be resting on the desk with very little wrist extension, some but not much. If your wrists are then resting on the table, they will be subject to contact pressure. Both of these combined may lead to stress on your tendons, nerves and soft tissue around the wrist. Suffice it to say that this is not a comfortable approach.
Practitioners will tell you to keep your hands and wrists in as much of a neutral position as possible to alleviate potential for strain.
This is where the floating typing style will come in.
Because of the tenting I do, especially once I get to the extreme ranges, >70°, I find that my wrists are floating above the desk. This helps me maintain a more neutral wrist posture and because there is no contact with the desk, there is no potential to have tendon/nerve issues during prolonged typing sessions. One thing to bear in mind is that resting the wrists on a hard desk surface while typing can create localized pressure and may encourage wrist extension or other non-neutral postures.
However, since I am supporting the arms through my shoulders and forearms rather than the wrists, floating typing can promote freer hand movement and may reduce discomfort during extended typing sessions.
Verdict
As the owner of two of these ZSA Navigator trackpads, I would encourage you to have one if you need a basic pointing device without the need to reach for a dedicated device. I would also recommend it for individuals who aggressively tent on a desk or mounting their halves to their chair.
If you use your Voyager flat on the table or with minimal tenting, I would recommend the Trackball instead as it makes more sense as a pointing device, especially since it has a wider surface of movement vs. the trackpad.
I would also recommend that you look into tweaking a dedicated mouse layer for the clicks and larger scrolls as the tap-to-click and two-finger gesture for scrolling are OK for basic usage but for longer sessions or where you require more accuracy, the dedicated mouse layer is definitely an improvement.
To purchase the Navigator, you can buy it here.